
Most people have had an ultrasound in a hospital or imaging center: a waiting room, a gown, a dim exam room, and a drive home. A home ultrasound visit replaces all of that with a knock on your door. The scan itself is the same diagnostic exam, performed by the same kind of credentialed sonographer and read by the same kind of board-certified radiologist. What changes is where you lie down. This guide walks through the whole thing in order, from entering your ZIP code to reading the report, so there are no surprises on the day.
One point to make plainly first, because it shapes everything else: we never diagnose. Our sonographer performs the scan, a board-certified radiologist reads it and writes the report, and your own physician interprets that report for you in the context of your history, labs and symptoms. A home visit changes the setting, not the roles. If you are deciding whether an ultrasound is the right test at all, or which one to book, that is a question for your doctor.
Step 1: Booking online
Everything starts on our booking page. You enter your ZIP code, which tells the system whether your address is in a home-visit area or near our clinic, and shows the times available for your location. You then choose the scan and pick the next open time that suits you. Appointment times are what the calendar shows; we do not promise a specific day, and the earlier you look, the more choice you will have.
Payment is a flat rate paid when you book. There is no facility fee, no separate bill from the radiologist, and HSA and FSA cards are accepted. We are a cash-pay practice and do not bill insurance, but every study comes with a superbill you can submit to your plan if it offers out-of-network reimbursement. Within our core service areas there is no travel fee; for addresses farther out, any travel fee is quoted before you commit.
The booking form also asks for the name of the doctor who should receive the report. Type “None” if you do not have one; you will still receive the report yourself. There is an optional referral upload on the same form. Most scans can be booked directly without a referral. Two cannot: DVT (vein clot) studies and the second-trimester anatomy scan require a referral, which you upload in the booking form and which we confirm before the visit. Our post Do you need a referral for an ultrasound? covers the details. One more distinction worth knowing at the booking stage: the elective heartbeat and gender visit is a non-diagnostic service with no radiologist report, and it does not replace the scans your OB or midwife orders.
Step 2: Your confirmation and prep instructions
Once you book, you receive a confirmation with your appointment time and the prep instructions for your specific scan. Prep is the part of a home visit you control, and it matters: a gallbladder that has contracted after breakfast, or a bladder that is not full, limits what the radiologist can see. The table below is our prep for each study. If your confirmation says something different, follow the confirmation.
| Scan | Prep |
|---|---|
| Complete or limited abdominal, gallbladder, AAA screening, and bundles that include the abdomen | Nothing to eat for 8 hours; water and your regular medications are fine |
| Renal and bladder, prostate (transabdominal), pelvic (transabdominal), first-trimester dating and viability | Full bladder: 32 oz of water an hour before, and do not empty your bladder |
| Pelvic, transabdominal plus transvaginal | Full bladder for the first part; empty before the transvaginal part |
| Transvaginal-only (lining and follicle checks) | Empty bladder |
| Second-trimester anatomy scan and growth scans | No prep |
| Thyroid | No prep; wear an open neckline |
| Breast | No lotion, powder or deodorant on the day |
| Carotid, scrotal, soft tissue, DVT | No prep |
Our full guide, How to prepare for an ultrasound, explains the reasoning behind each rule. If you need to change your appointment, contact us as early as you can so the time can go to someone else. If you are unwell on the day in a way that worries you, read the section near the end of this post on when a home visit is not the right choice.
Step 3: What our sonographer brings
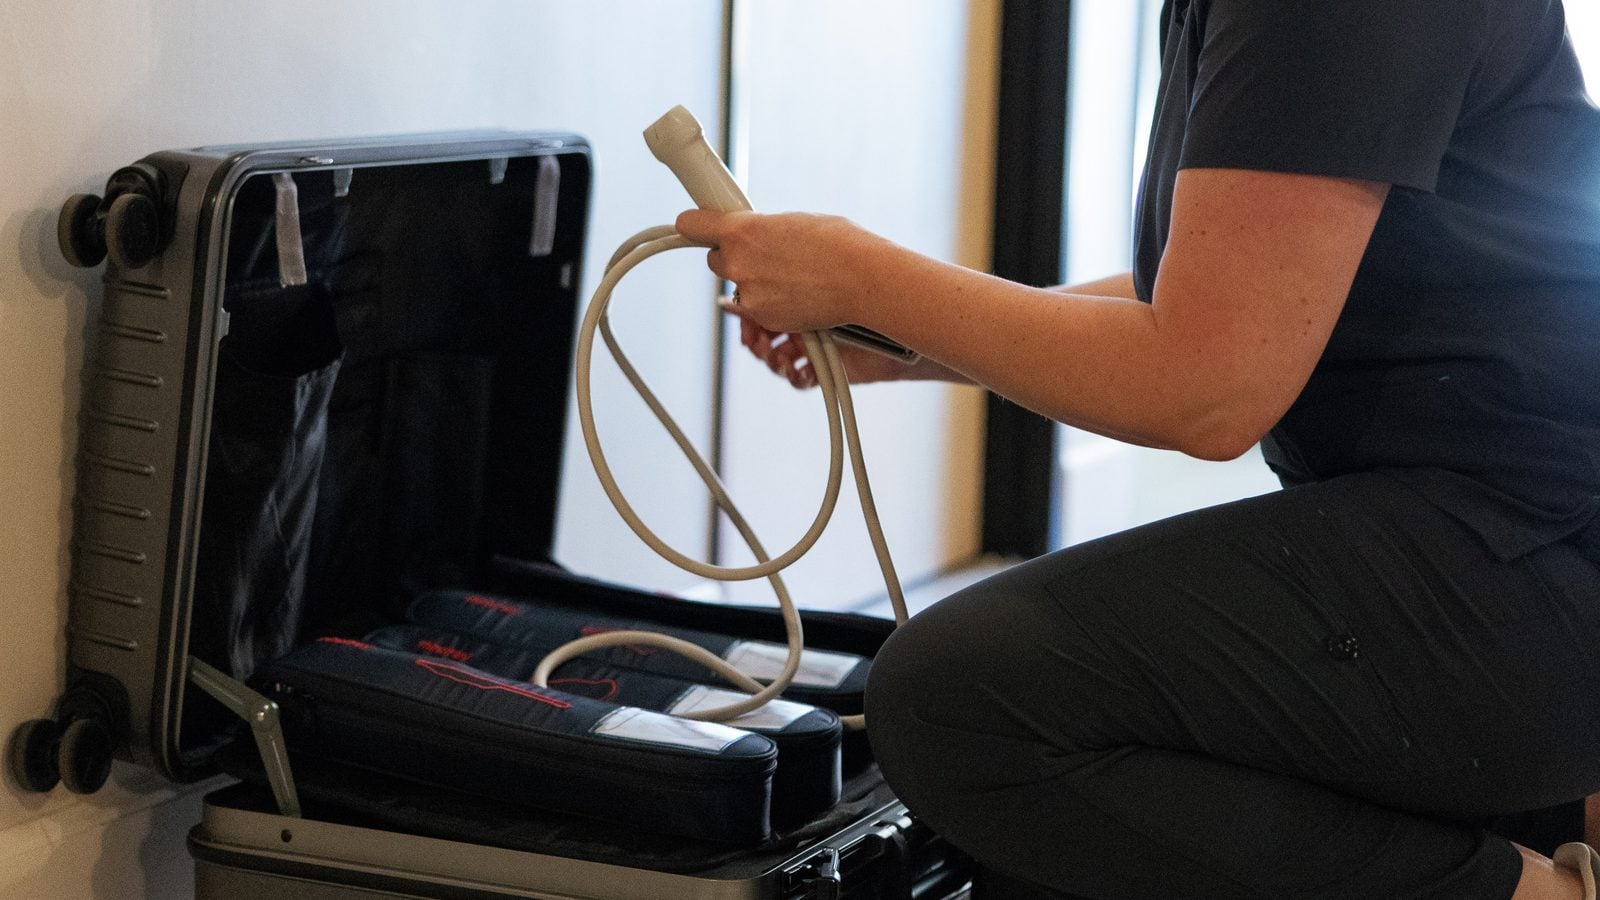
Our sonographer arrives with a portable diagnostic ultrasound system, the transducers needed for your study, ultrasound gel and the supplies for the exam. “Portable” describes the case it travels in, not the quality of the study: it is the same diagnostic exam we perform in our clinic, producing images a radiologist reads in the same way. Nothing about the exam is modified to fit a living room.
Ultrasound uses high-frequency sound waves, not radiation. The U.S. Food and Drug Administration notes that “unlike X-ray imaging, there is no ionizing radiation exposure associated with ultrasound imaging,” and that a thin layer of gel on the skin lets the sound pass into the body. There are no needles and no injections; we do not draw blood, and we do not perform biopsies, injections, drainage procedures or saline sonograms.
Our sonographers hold ARDMS credentials, the registry that administers examinations and awards credentials in diagnostic medical sonography. That is the same credential you would expect in a hospital department. The sonographer’s job at your home is to acquire a complete, protocol-driven set of images for the radiologist, which is the same job they do in the clinic.
Step 4: What to have ready
A home visit asks very little of the space, but a few minutes of preparation make the exam faster and more comfortable.
- Somewhere to lie down. A bed, a couch or any firm surface you can lie flat on, with enough room for the sonographer to sit or stand on one side. A dining table is not comfortable; a bed with access from one side is ideal.
- An outlet nearby. The ultrasound system plugs into a standard household outlet. Within reach of the bed or couch is best so cables are not stretched across a walkway.
- A quiet room. The sonographer will ask you to hold your breath, change position and lie still at times, so a room without a television running or children playing is easier for everyone.
- Pets in another room. Even friendly dogs and cats want to investigate the equipment and the gel. Please settle them elsewhere before the visit.
- Loose, two-piece clothing. You will not change into a gown. For abdominal, pelvic and kidney scans, a top you can lift and pants or a skirt you can lower a few inches is all that is needed. For a thyroid or carotid scan, an open neckline; for a breast scan, a top that opens in front.
- Your prep done. Fasting finished, bladder full or empty as instructed, no lotion for a breast scan.
- A towel. We bring supplies, but a spare towel of your own to protect bedding from gel never hurts.
- The name of the doctor who should receive the report, if you did not enter it when you booked, or any update to it.
Step 5: Who can be present
You choose. A spouse, partner, parent, adult child, friend or caregiver is welcome in the room for the whole visit or any part of it. For pediatric scans a parent or guardian is always present. For elective heartbeat and gender visits, bringing family along is often the whole point. For exams that involve undressing, such as breast, pelvic, transvaginal or scrotal studies, many people prefer a support person present and others prefer privacy; either is fine, and you can change your mind at any point. If you would like a moment alone with the sonographer to ask a practical question, just say so.
Step 6: The scan itself, and how long it takes
The visit begins with a short check-in. The sonographer confirms your name and date of birth, the scan you booked, and a few questions relevant to the study: where the symptoms are, prior surgeries in the area, and, for OB studies, the first day of your last period. Those answers go on the worksheet the radiologist reads alongside the images. It is a history for the report, not a consultation. The sonographer then sets up the system, applies warm or room-temperature gel to the area, and moves the transducer across the skin while watching the screen. You may be asked to hold your breath, roll onto your side, or raise an arm overhead. Pressure is firm but should not be painful; tell the sonographer if it is.
How long it takes depends on the study. The ranges below are the appointment windows our booking calendars reserve for home visits; hands-on scanning is usually shorter than the full window, with the rest spent on check-in, setup and packing up.
| Study | Home-visit appointment window |
|---|---|
| Single-organ studies: thyroid, limited abdominal, AAA screening, breast (one side), pelvic transabdominal, prostate, follicular monitoring, soft tissue | About 45 minutes |
| Complete abdominal, renal and bladder, carotid duplex, scrotal, breast (both sides), pelvic transabdominal plus transvaginal, DVT (one limb), first-trimester dating and viability, limited growth scan | About 60 minutes |
| DVT, both limbs | About 75 minutes |
| Second-trimester anatomy scan | About 90 minutes |
| Multi-scan screening bundles | About 75 to 120 minutes, depending on how many studies are included |
For context, RadiologyInfo.org, the patient site of the American College of Radiology and the Radiological Society of North America, says pelvic ultrasound exams are “usually completed within 30 minutes.” A home visit does not take longer because it is at home; it takes about as long as the same exam anywhere, plus the few minutes of setup at the start and end.
Step 7: What the sonographer will and won’t say
This is the part of a home visit that surprises people most, because the setting feels so personal. The sonographer will talk you through the exam: what they are scanning, when to hold your breath, when to roll over, and when they have the images they need. They will answer practical questions about the process and about what happens next. What they will not do is tell you what the images show, or whether anything looks normal or abnormal. That is not evasiveness. Interpreting the study is the radiologist’s role, and explaining what it means for you is your doctor’s, and a sonographer who offered an opinion on the spot would be guessing without the full read. Our post Why won’t the sonographer tell me what they see? goes into the reasons in detail.
Two practical consequences. First, there are no results at the visit, and no one at the visit will confirm or rule anything out, so plan on the report rather than the conversation. Second, if the sonographer takes extra images or spends longer on one area, it does not mean something is wrong; thorough protocols and difficult imaging windows both take time. If you leave the visit with a question about what the scan might show, write it down and bring it to your physician along with the report.
Step 8: After the visit
After the sonographer leaves, the images and worksheet go to a board-certified radiologist, a physician who specializes in interpreting imaging. The radiologist reads the study and writes the report. The report is ready within 24 hours and is sent to you and, if you named one, to your doctor. A superbill is included with it for anyone who wants to submit the visit to an out-of-network plan.
What happens next is the part we want to be clearest about. A radiology report is written for physicians, and its wording can look alarming or reassuring out of context. Your own doctor is the person who puts it in context with your history, your labs and your symptoms, and who decides whether anything further is needed. Our post What does my ultrasound report mean? explains, in general terms, how reports are structured and what common phrases can mean, but it is not a substitute for that conversation.
Sharing the report with your doctor is simple:
- If you named a doctor when you booked, we send the report to them directly. It still helps to let the office know it is coming.
- If you typed “None,” you can forward the report yourself, upload it through your doctor’s patient portal, or bring a printed copy to your next appointment. Ask the office which they prefer.
- If you do not currently have a primary care physician, the report is yours to share with any clinician you choose to see; a new patient visit is a good place to start.
- Keep a copy. A prior report is useful for comparison if your doctor recommends a follow-up study later.
Privacy at home
A home visit is, if anything, more private than a clinic: one sonographer, your own room, and no waiting area. Your information is handled to the same standards as it would be in a clinic. We handle health information under HIPAA standards; the HIPAA Privacy Rule, as the U.S. Department of Health and Human Services describes it, sets “national standards to protect individuals’ medical records and other individually identifiable health information.” Your images and report are stored securely, and the report goes only to you and the doctor you named. No one else in your household sees it unless you share it.
When a home visit is not the right choice
Home visits are for planned, non-urgent imaging. There are situations where booking one is the wrong move, and we would rather say so plainly than have you wait for an appointment that should have been an emergency room visit.
Call 911 or go to the nearest emergency department for severe chest pain or pressure, trouble breathing, sudden weakness or drooping on one side of the body, sudden difficulty speaking, seeing or walking, fainting, heavy bleeding, severe abdominal or pelvic pain, a swollen, painful leg together with chest pain or shortness of breath, high fever with a stiff neck, or significant bleeding or severe pain in pregnancy. MedlinePlus, the National Library of Medicine’s patient site, keeps a plain-language list of symptoms that warrant the emergency room; it is linked in the sources below. In those situations, a hospital can scan you at the bedside, read the images on the spot and treat you in the same building. A scheduled home visit cannot, and our reports are not stat reads.
A hospital or imaging center is also the right place when:
- Your doctor has asked for CT or MRI, or for a study that needs contrast; we offer ultrasound only.
- The study is a procedure: an ultrasound-guided biopsy, injection, drainage or saline sonogram. We do not perform these.
- You are already admitted to a hospital, or your doctor needs the result immediately to make a treatment decision.
- Your doctor wants an echocardiogram or another specialized study we do not list on our services page. If a scan is not on the list, we do not offer it; ask your doctor where to have it done.
For a side-by-side comparison of the three settings, see Mobile ultrasound vs hospital vs imaging center. For the reasons patients choose home visits in the first place, such as mobility limits, new parents, monitoring schedules and privacy, see 5 benefits of mobile ultrasound.
Getting your scan with us
To book a home visit, go to our booking page, enter your ZIP code, choose your scan and pick the next open time. You pay a flat rate when you book, with no facility fee, and HSA and FSA cards are accepted. Name the doctor who should receive the report (or type “None”), upload a referral if your scan requires one, and watch for the confirmation with your prep instructions. Our sonographer brings the scan to you anywhere in our California service areas, a board-certified radiologist reads it, and the report is ready within 24 hours for you and your doctor to discuss together.
Getting a scan with us: our ultrasound services page lists every scan we offer. You can book online for our clinic, or we bring the scan to you at home. A board-certified radiologist reads every study, and the report is ready within 24 hours. Your own doctor interprets the results for you.
Sources
- U.S. Food and Drug Administration: Ultrasound imaging
- RadiologyInfo.org (ACR and RSNA): General ultrasound
- RadiologyInfo.org (ACR and RSNA): Pelvic ultrasound
- American Registry for Diagnostic Medical Sonography: About ARDMS
- U.S. Department of Health and Human Services: The HIPAA Privacy Rule
- MedlinePlus: When to use the emergency room (adult)
- AIUM Practice Parameter for the Performance of an Ultrasound Examination of the Female Pelvis (2020)
Frequently asked questions
Is a home ultrasound the same quality as one in a hospital?
The exam is the same diagnostic study: a portable diagnostic ultrasound system, an ARDMS-credentialed sonographer following the same imaging protocol, and a board-certified radiologist reading the images. What a hospital adds is on-the-spot reads, treatment in the same building, and other modalities such as CT and MRI, which is why urgent problems belong there.
How long does a home ultrasound visit take?
Our booking calendars reserve about 45 minutes for most single-organ studies, about 60 minutes for complete abdominal, kidney and bladder, carotid, two-part pelvic and first-trimester scans, about 90 minutes for the second-trimester anatomy scan, and roughly 75 to 120 minutes for multi-scan bundles. Hands-on scanning is usually shorter than the window.
What do I need to have ready at home?
A bed, couch or firm surface to lie on with room on one side, a standard outlet nearby, a quiet room, pets settled elsewhere, loose two-piece clothing, and your prep done (fasting or a full bladder, depending on the scan). We bring the ultrasound system, gel and supplies.
Will the sonographer tell me what they see?
No. The sonographer acquires the images; interpreting them is the radiologist’s job, and explaining what they mean for you is your doctor’s. You will not receive results at the visit. The radiologist’s report is ready within 24 hours and goes to you and the doctor you named.
Do I need a referral for a home ultrasound?
Most scans can be booked directly. DVT (vein clot) studies and the second-trimester anatomy scan require a referral, which you upload in the booking form; we confirm it before the visit. The form also asks for the name of the doctor who should receive the report; type “None” if you do not have one.
Can someone be with me during the scan?
Yes. You decide who is in the room. A family member, partner, friend or caregiver is welcome for all or part of the visit, and a parent or guardian is always present for a child’s scan. If you prefer privacy for an exam that involves undressing, that is equally fine.
This article is general health information, not medical advice. It does not replace a conversation with your own physician, who knows your history and can interpret results in context. If you have symptoms that worry you, contact your doctor; if you think you are having a medical emergency, call 911.